30 May 2013

Mint Pulav

Mint leaves are a very aromatic herb which has found a permanent place in most of the Indian kitchen. The fresh greeny leaves are a feast to the eyes, nose and our taste buds. The mint leaves have enormous health benefits. This herb is mostly used in most of the biryani preparation to bring out a rich flavor for the biryani rice. This healthy leaf can be prepared in numerous ways.  Mint leaves can be prepared as chutney, thovayal, fresh juice, mixed rice, pulav, tea & topping ingredient for biryani’s etc.

Health Benefits of Mint Leaves:


1. Mint leaves have extensive use in aromatherapy due to its therapeutic properties.
2. Eliminates bad breadth.
3. Mint is a good cleanser for the blood.
4. Regular consumption of herbal Mint tea aids in weight loss.
5. Mint is a strong diuretic, thus eliminates the toxins from our body.
6. Mint reduces growth of fungus and bacteria in the body on regular usage.

Here is an easy and quick method to prepare very tasty and flavorful mint pulav. This pulav can be simply served with any raita or papad or any side dish of your choice.

Ingredients:

Mint leaves – 2 cups (leaves plucked and cleaned)
Onion – 1, slit into big slices
Ginger-garlic paste – 1 tsp
Green chillies – 4 or 5
Salt – 2 tsp
Rice – 2 Cups (washed and drained)
Water – 3 to 3 ½ cups max
Seasoning ingredients: Oil – 4 tbsp, cloves – 2, cinnamon stick – 2, cardamom – 2, Mixed nuts (almond, pistachio, cashews) – 2 tbsp (broken into small pieces)


 Method:

1. Grind washed and cleaned mint leaves and green chillies together, adding very little water into a thick mint paste.


2. In a pressure cooker, add the seasoning ingredients and stir till the nuts turn light brown and the spices emancipate nice aroma.

3. Add ginger-garlic paste and fry well.


4. Add onions and sauté will translucent.


5. Add the mint paste and mix well and let it cook for 2 minutes.


6. Add the washed rice and stir fry the rice along with the mint paste and other ingredients. Add required salt now.


7. Add the water and mix everything well. Close the cooker and lower the flame to the minimum, add the weight and pressure cook for about 10-12 minutes & switch off. Let the pressure drop on its own completely and then open the cooker and mix the rice just few times.


A Very flavorful mint pulav is ready to serve.


29 May 2013

Ridge Gourd Masiyal

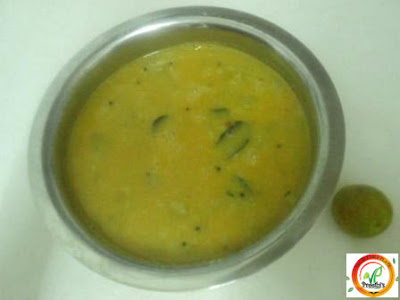
Ridge gourd Masiyal (Peerkangai Masiyal) is a south-indian gravy dish, similar to sambar or kozhambu which is served with rice. This masiyal does not contain tamarind extract as the normal sambar’s do. The tangy / sour taste for the masiyal comes from lemon or tomato. This masiyal is prepared mostly with moong dhal (sometimes with toor dhal). This can be relished with any vegetable dry curry. Ridge gourd is a very healthy watery vegetable, hence using this in our regular cooking provides immense health benefits.


How to cut Ridge Gourd:
 
1. Cut both the corners of the ridge gourd and peel the skin of the ridge gourd using a peeler.
2. Slit along the length of the ridge gourd and slice them into medium size cubes.
 
Health Benefits of Ridge gourd:
 
1. It is high in dietary fibre, hence very good for health.
2. It aids in weight loss.
3. Due to his high fibre quotient, it prevents constipation and also helps to control piles.
4. It has high beta carotene which is very good for the eyes.
5. It has blood purifying properties.
 
Ingredients:
 
Ridge Gourd – 2 cups, cut to cubes
Moong dhal – 1 cup
Sambar Powder – 1 tsp
Lemon juice  squeezed from 1 medium sized lemon
Seasoning ingredients: Oil – 1 tsp, mustard seeds – 1 tsp, broken urud dhal – 1 tsp, curry leaves – 10
  
Method:
 
1. Pressure cook moong dhal and Ridge gourd together and cook for 3 whistles. Cool and open.


2. In a kadai/non-stick pan, season as given and pour the dhal-vegetable mixture into it.


3. Add required amount of salt and boil for 3-4 minutes.
 
4. Add a teaspoon of sambar powder and mix well. Boil for 2 more minutes and remove.
 
 
5. After removing from the stove, add the lemon juice and mix well.
 
 
 Tips:
 
1. Adding lemon juice while cooking will made the masiyal bitter. Always mix lemon juice only after removing the masiyal from the stove.
2. In case, sambar powder is not available, use chilly powder or green chillies.


22 May 2013

Aloo Paratha

Aloo Paratha (Potato Paratha) is plain paratha(made with wheat flour) stuffed with aloo (potato) filling. Aloo paratha is probably the most famous and relish able paratha among many others and enjoyed much by children and adults. This paratha is flavorful and very tasty too.  The authentic combination for this aloo paratha is yoghurt and pickle. As this paratha already has a vegetable stuffing inside, it requires no other side dish, but if you choose to have, you can go for any gravy side dish. But I prefer it with simple yoghurt, so that the taste of aloo is relished as it is.

Ingredients:

Potato – 2 Big
Wheat flour – 2 Cups
Cumin seeds – 1 tsp
Ginger-garlic paste – 1 tsp

Green chillies - 2, finely chopped
Red chilly powder – 1 tsp
Garam masala powder – ½ tsp
Coriander powder – 1 tsp
Turmeric powder – ½ tsp
Coriander leaves – 2 tsp, finely chopped
Salt – 2 tsp
Oil – 2 tsp for seasoning, ¼ cup for cooking paratha’s
Water – 1 Cup

Preparation of Chapathi dough:
 

Take the wheat flour into a broad vessel and add a teaspoon of salt. Add water little by little and knead like as you do for normal chapathi. Keep it aside for 10 minutes. Make equal size balls and keep it ready.

Preparation of Potato Stuffing:

1. Pressure cook the Potatoes adding required water for about 4-5 whistles.
2. Cool and remove and then peel the potato skin and mash well with hands/ladle.


3. In a non-stick pan, add oil and when it gets hot, add cumin seeds and green chillies and fry for few seconds.


4. Add ginger-garlic paste and fry until aromatic.


5. Add the masala powders – red chilly powder, coriander powder, garam masala powder, a teaspoon of salt, turmeric powder and coriander leaves and mix well. Cook until the masala’s are well coated on the aloo and the raw smell leaves. The stuffing will be aromatic after adding all these powders.


6. Cool it and divide the stuffing in equal size balls (as same number of chapathi balls) and keep ready.


Preparation of Aloo Paratha:

1. In the rolling board, take one ball of wheat flour ball and roll it using the rolling pin about your palm size.


2. Take one ball of the Potato stuffing, place it at the center and from the corners, stretch the dough up and place it on the center of the stuffing until the dough completely covers the stuffing.


3. Once done, press the stuffed paratha dough gently and flatten it, dust it with wheat flour on both sides and start rolling gently from the corners and then centre and flatten it as we do for chapathi and take the rolled paratha to a tray. If you find the stuffing spreading out of the wheat flour or sticky while rolling, add little wheat flour in those areas and roll gently, so the aloo stuffing doesn’t spread out.


4. Repeat step 3 for every wheat flour and potato stuffing balls that you have.


5. Heat the non-stick tava and drizzle little oil and spread it across the tava. Take one aloo paratha and place it on the tava, wait for few seconds. Then toss it over, you will find brown spots over the paratha. Drizzle oil on it evenly. Then toss it over again and do the same.


6. Cook till the paratha’s are done with the brown spots spread evenly on either sides. If needed, add little extra oil on both sides while cooking & then remove from the tava.


7. Repeat step 5 & 6 for all your aloo paratha’s.


18 May 2013

Peanut Chutney

Peanut chutney is a very simple and easy to make chutney that goes extremely well with idlies. Whenever this chutney is made at home, there is always extra idly consumption by us. This is also a good variation from our normal coconut, tomato or onion chutneys. This recipe does require coconut.

Roasted peanuts are used for this preparation, nowadays roasted peanuts are readily available in our market, we can use them, otherwise we need to roast the peanuts and peel the skin and use it for this chutney. I learnt this recipe from my sister-in-law (Prasanna).

Best accompaniment for: Idly

To roast peanut:

Heat the kadai/non-stick pan, add peanuts to them and dry roast for about 10-20 minutes on a medium flame. To know whether the peanut has roasted well, when you take one or two peanut and rub them between your palms, the skin should peel easily and the peanut will have light brown coating on its skin. At this stage, remove them and use them for chutney.

Ingredients:

1. Roasted Peanuts – 2 Cups
2. Red chillies – 6
3. Garlic pods – 6-8
4. Cumin seeds - 1 ½ tsp
5. Tamarind – ½ gooseberry size
6. Salt – 2 tsp
 

Method:

1. Take all the ingredients into a mixer/blender and grind adding required water. The chutney should not be very thick or very loose.

2. No need to season, remove and serve as it is.


Curry Leaves Kozhambu

Curry leaves is an essential ingredient in South Indian cooking, especially tamil nadu. You will find this as a MUST seasoning ingredient in most of our dishes. The reason is this adds some nice flavor & nice dressing to our dish. However, our tendency is to always keep these curry leaves aside while eating. If only we realize how powerful and beneficial this wonder leaf is to our health, we will not neglect this healthy leaf again.  Curry leaves also has a very pivotal role to play in our siddha and ayurvedic treatments.

Health Benefits of Curry Leaves:

1. Curry leaves prevents graying of hair and give nice dark colour to our hair, hence used in effective hair treatments.
2. It is rich in Vitamin A, B, B2 and C , calcium and iron in plenty.
3. This is good for the eyes, eating curry leaves regularly improves your vision.
4. It cures stomach related problems like indigestion, ulcer, diarrhea, “pitham” vomit etc.
5. Helps in Cholesterol reduction.
6. Studies reveal that those who are eating few curry leaves regularly have lost their weight.

There are various ways this curry leaves can be included as a main ingredient in our cooking other than its regular use for seasoning. We can make karuvepillai kozhambu, karuvepillai podi, karuvepillai chutney, karuvepillai thuvayal etc with these healthy leaves. So let us include karuvepillai as a MUST dish in our diet and reap many health rewards.


Generally no vegetable is added into this kozhambu, the kozhambu after it’s preparation is thick gravy in consistency, similar to vatha kozhambu. But  I have used garlic in this version, as we are garlic lovers and we enjoy the flavor of garlic in all our kozhambus. Usage of garlic is however optional.
 

Here is the karuvepillai kozambu version.

English Name : Curry leaves / Tamil Name : Karuvepillai / Telugu Name : Karivepakku / Hindi Name : Karipatta

Ingredients:

Curry leaves - 2 Cups
Tamarind extracted water – 2 Cups
Channa dhal – 1 tbsp
Urud dhal – 1 tbsp
Pepper – 2 tsp
Cumin seeds – 1 tsp
Red Chillies – 4
Garlic – 10- 12 pods (optional)
Fenugreek powder – ½ tsp (optional)
Rice powder – 1 ½ tsp (optional) – mixed in ¼ cup water
Seasoning: Oil – 1 tsp, mustard seeds – 1 tsp, broken urud dhal – 1 tsp, channa dhal – 1 tsp, curry leaves – 8 to 10, hing – 1 tsp

Curry leaves powder preparation:

1. Dry fry separately channa dhal, urud dhal, pepper & cumin seeds.


2. In ½ tsp oil, fry red chillies.


3. In 1 tsp oil, fry the curry leaves.


4. Cool all the above and powder and keep ready.


Method:

1. In a kadai, add 2-3 tsp of oil, add garlic and sauté will it is aromatic and well cooked.


2. Add the 2 cups of tamarind extracted water, little hing, a teaspoon of salt and bring to a nice boil to get rid of the raw smell. Let the tamarind water consistency reduce to half.


3. Now add the Curry leaves powder and mix well. Add required salt now and continue boiling.


4. The kozhambu should become thick in consistency (you will see the powder well mixed with the tamarind and has a tinch of green colour), at this stage season as given and then remove.


5. After removing from stove, add ½ tsp of fenugreek powder for added flavor (this is an optional step).

 Tips:

1. If the kozhambu consistency is not thick, add the rice powder mixed in water while boiling, this will thicken the kozhambu. This is optional.


2. Cook covered for a flavorful kozhambu.
 

3. Adding fenugreek powder at the end is only an optional step. If fenugreek powder is used, use it after removing the kozhambu from stove. Add ½ teaspoon of it (not more) and stir well. This powder has a bitter taste, adding it while cooking can make the kozhambu taste bitter.

Turnip Chapathi

 Turnip (NoolKhol) is one the healthy root vegetable we can include in our regular diet. Turnip can be prepared in numerous ways. In south-india especially tamil nadu, turnip is very commonly used as a vegetable in making sambar. Also, there can be turnip curry, turnip chutney, turnip soup (a very healthy soup) made out of it. This recipe is a very different adaptation of turnip. This is a turnip chapathi, which one wouldn’t have often heard of. This turnip chapathi is similar to any other vegetable based chapathi I prepare like carrot chapathi, mooli chapathi etc. It is very easy to make and doesn’t take too much time.  Prior to making the chapathi dough, this turnip requires mild cooking to eliminate the raw smell and the water it has  , so that the dough doesn’t get sticky. Once cooked, it is delicious to eat it along with any vegetable gravy as a side-dish, or even with pickle and yoghurt. This chapathi has a nice flavor.

Health Benefits of Turnip:

1. Low Calorie root vegetable
2. Rich in Vitamin C
3. The fresh greens are source of calcium, copper, iron and manganese.

English Name: Turnip/Tamil Name: Noolkhol/Hindi Name : Gaanth Gobhi


Ingredients:

Turnip (peeled and grated) – 2
Green chillies – 2, finely chopped
Cumin seeds – ½ tsp
Turmeric Powder – ½ tsp
Atta – 2 cups
Salt – ¾ tsp
Water – ½ to ¾ tumbler
Oil – ½ tsp

Turnip Fry:

1. Take the grated turnip and squeeze the water out of it.


2. In a kadai, add oil , add cumin seeds and green chillies and fry for few seconds.


3. Add the water squeezed grated turnip and turmeric powder and very little salt and fry for 3-4 minutes, until turnip is fried and looks dried up of its water.


4. Remove from stove, cool and keep ready.

Chapathi Preparation:

1. In a broad vessel, add the atta, turnip fry, required salt (already little salt was added for the turnip fry, so add less than usual quantity) and mix well.


2. Add water little by little and make normal, soft chapathi dough.


3. Don’t keep this dough aside for long time. Recommended to start rolling it out immediately. Make medium size equal balls and roll like normal chapathi using rolling pin and rolling board.


4. Heat the non-stick tava, place one chapathi on it, and wait till small brown spots appear, then turn the chapatti around and repeat the same.


5. Spread little oil over the chapathi and toss it around and do the same on the other side. Cook the chapathi until even brown spots appear on both the sides & then remove.