31 October 2013

Coconut Burfi

Coconut Burfi (Coconut Cake) is one of the popular sweets prepared in many house-hold in South India, especially Tamil Nadu , on the occasion of Diwali. It is made with coconut and sugar. Children will love this for its sweetness.

Ingredients:

Coconut - 2 Cups
Sugar - 2 1/4 Cups
Ghee - 3 tbsp for cooking
Ghee - 3 tbsp for greasing
Cardamom powder - 1 tsp
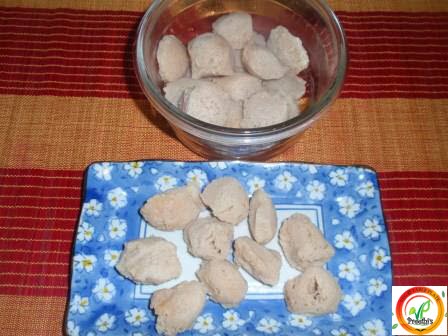
Cashews (broken) -  20


Pre-requisite:

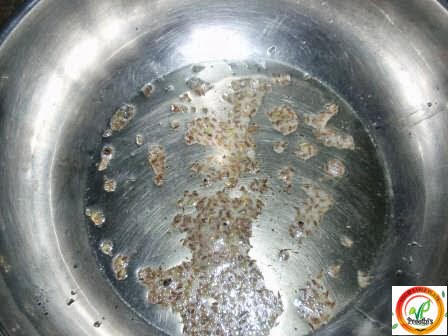
1. In 2 teaspoon of ghee, fry the cashews till light brown and keep ready for use.


Method:

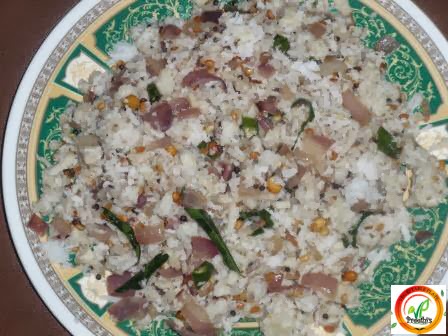
1. Mix the coconut , 3 tbsp of ghee and sugar into a pan/kadai well and cook until the mixture starts getting very thick and  stops sticking to the corners of the pan. (This takes approximately around 5 to 10 minutes).

2. Just before removing, add cardamom powder and mix well and remove.


3. Grease a plate with ghee and drop this thick coconut-sugar mixture into it and level with cashews on top of it and allow it to set for minimum 30 minutes.


4. Made horizontal and veritcal slits using knife (it appears like diamond slices) & make slice and remove.


Tips:

Don't allow the coconut-sugar mixture to dry up, while little moisture is left, remove it from the pan. If fried too much and all the moisture evaporates, the cake will not come in shape, the burfi will break.

Theankuzhal

Theankuzhal is one of the popular savories prepared in many house-hold in South India, especially Tamil Nadu , on the occasion of Diwali. It is a crispy deep fried snack. It is made with rice flour. Children will love this for its crispness and taste. Also it makes up a good snack during tea/coffee time too. Make this Theakuzhal this diwali and relish it with your family.

To make this Theankuzhal you need the traditional Theankuzhal mould and press, which is available in the market (also illustrated in photo). To make the Theankuzhal dough easy to drop when squeezed, prior to its preparation, grease the inside of the mould and bottom of the press with oil, this will enable smooth flow of the dough from the mould into your pan.

Ingredients:

Rice Flour - 2 Cups
Urud dhal powder - 4 tsp
Cumin Seeds - 1 tsp
Salt - to taste
Hing - 1 tsp
Butter - 4 tbsp
Water - 1 Cup
Hot oil - 3 tsp - For mixing
Oil - For frying

How to make urud dhal powder:
 
1. Take urud dhal and dry fry until it becomes light brown.
2. Cool and powder and keep ready for use.


Method:

1. In a big bowl/vessel, add the rice flour, urud dhal powder, cumin seeds, salt, hing, oil and butter and mix well. Add the water little by little and make a dough similar to chapathi dough in consistency (the dough need not be too thick, slightly loose dough is good).


2. In a big kadai, add required oil and once it becomes hot, take the "Theankuzhal press mould" and stuff some dough into it and squeeze the dough into circles into the hot oil. Wait till the Theankuzhal becomes light brown in color, keep turning sides to cook evenly. Once it turns light brown, remove from the oil and shift into another vessel spread with tissue paper to absorb any excess oil.

 
Tips:
 
If you are not comfortable directly dropping the dough into the oil, then take a big ladle with holes (jalli karandhi as we call in tamil), reverse the ladle and grease it with little oil and then squeeze the mould in circular motion to make the theankuzhal on the reversed side. Then hold the ladle with the dough on top and take it close to the hot oil or slightly touching the oil and reverse it (so the squeezed dough comes below) , the dough drops into the oil & then remove the ladle from the oil. Repeat this for each theankuzhal that you make.

Ribbon Pakoda

Ribbon Pakoda is one of the popular savories prepared in many house-hold in South India, especially Tamil Nadu , on the occasion of Diwali. It is a crispy deep fried snack. It is made with some mixed flours and mild spice powders. Children will love this for its crispness and taste. Also it makes up a good snack during tea/coffee time too. Make this Ribbon Pakoda this diwali and relish it with your family.

To make this Ribbon Pakoda you need the traditional Pakoda mould and press, which is available in the market (also illustrated in photo). To make the ribbon pakoda dough easy to drop when squeezed, prior to its preparation, grease the inside of the mould and bottom of the press with oil, this will enable smooth flow of the dough from the mould into your pan.

Ingredients:

Gram Flour - 2 Cups
Rice Flour - 1 Cup
Red Chilly Powder - 1 1/2 tsp
Salt - to taste
Hing - 1 tsp
Butter - 4 tbsp
Water - 1 Cup
Hot oil - 3 tsp - For mixing
Oil - For frying

Method:

1. In a big bowl/vessel, add the gram flour, rice flour, red chilly powder, salt, hing, oil and butter and mix well. Add the water little by little and make a dough similar to chapathi dough in consistency (the dough need not be too thick, slightly loose dough is good).


2. In a big kadai, add required oil and once it becomes hot, take the "Ribbon Pakoda press mould" and stuff some dough into it and squeeze the dough into circles into the hot oil. Wait till the pakoda becomes light brown in colour, keep turning sides to cook evenly. Once it turns light brown, remove from the oil and shift into another vessel spread with tissue paper to absorb any excess oil. 
 
 
Tips:

If you are not comfortable directly dropping the dough into the oil, then take a big ladle with holes (jalli karandhi as we call in tamil), reverse the ladle and grease it with little oil and then squeeze the mould in circular motion to make the ribbon pakoda on the reversed side. Then hold the ladle with the dough on top and take it close to the hot oil or slightly touching the oil and reverse it (so the squeezed dough comes below) , the dough drops into the oil & then remove the ladle from the oil. Repeat this for each ribbon pakoda  that you make.

Omampodi

Omampodi is one of the popular savories prepared in many house-hold in South India, especially Tamil Nadu , on the occasion of Diwali. It is a crispy deep fried snack. It is made with some mixed flours and Omam (Ajwain). Children will love this for its crispness and taste. Also it makes up a good snack during tea/coffee time too. Make this omampodi this diwali and relish it with your family.

To make this omampodi you need the traditional Omampodi mould and press, which is available in the market (also illustrated in photo). To make the omampodi dough easy to drop when squeezed, prior to its preparation, grease the inside of the mould and bottom of the press with oil, this will enable smooth flow of the dough from the mould into your pan.

Ingredients:

Gram Flour - 2 Cups
Rice Flour - 4 Tablespoon
Omam - 2 handful
Salt - to taste
Hing - 1 tsp
Butter - 4 tbsp
Omam Water - 1 Cup
Hot oil - 3 tsp - For mixing
Oil - For frying

Pre-Requisite:

1. Soak the oman in just enough water until it is immersed and keep aside for minimum 15 minutes. Then grind it adding some more water. Once ground to paste, strain the omam water through a strainer/colander and keep ready for use.

Method:

1. In a big bowl/vessel, add the gram flour, rice flour, salt, hing, oil and butter and mix well. Add the omam water little by little and make a dough similar to chapathi dough in consistency (the dough need not be too thick, slightly loose dough is good).


2. In a big kadai, add required oil and once it becomes hot, take the "Omam press mould" and stuff some dough into it and squeeze the dough into circles into the hot oil. Wait till the oomapodi becomes light brown in colour, keep turning sides to cook evenly. Once it turns light brown, remove from the oil and shift into another vessel spread with tissue paper to absorb any excess oil. 

Tips:
 
If you are not comfortable directly dropping the dough into the oil, then take a big ladle with holes (jalli karandhi as we call in tamil), reverse the ladle and grease it with little oil and then squeeze the mould in circular motion to make the omampodi on the reversed side. Then hold the ladle with the dough on top and take it close to the hot oil or slightly touching the oil and reverse it (so the squeezed dough comes below) , the dough drops into the oil & then remove the ladle from the oil. Repeat this for each omampodi  that you make.

29 October 2013

Rava Pongal

Rava pongal is a good alternative for those who want a change from the normal rice pongal (venpongal). Also for non rice eaters, rava pongal, is a sumptuous filling tiffin. Made with rava and toor dhal, it is prepared very similarly to venpongal, except rice is substituted with rava. This pongal goes very well with any chutneys, however coconut chutney is the best combination I prefer for this pongal.  Try and relish this different pongal.

Ingredients:

Rava (Sooji) - 1 Cup
Moong dhal - 1/2 Cup
Hot water - 2 to 2 1/2 Cups
Black Pepper  - 1.5 tsp
Cumin seeds - 1.5 tsp
Ginger pieces (Chopped) - 1 tsp
Curry leaves - 10
Broken Cashews - 6
Salt - 2 tsp
Ghee - 6 to 8 tsp and/or Oil - 2 tsp


Pre-requisite:

1. Pressure cook moong dhal adding required water for 3 whistles. Cool and keep ready.
2. Prepare pepper-cumin powder by grinding the black pepper and cumin seeds raw into a powder.
3. Keep boiling/hot water ready.


Method:

1. In a pressure cooker, add 2 tsp of ghee/oil and when it becomes hot, add the pepper-cumin powder, ginger pieces, broken cashews and curry leaves and fry until the cashews turn light brown and the powder & ginger becomes flavourful and cooked.


2. Add the rava (sooji) and mix. Fry till the rava turns slightly aromatic and light brown. Add required salt now.


3. Add the cooked moong dhal and immediately pour the hot water and give a nice stir for all the ingredients to blend well with each other.


4. Add another 2 to 3 tsp of ghee and mix well. Close the cooker, sim the flame and steam (without adding the weight) for about 5 minutes and then remove.


5. Cool and open and serve the hot rava pongal, topped with a teaspoon of ghee.

 
Tips:

1. Keep always 1 cup of extra hot water ready, as it will be handy in case the pongal is very thick and needs loosening by adding some more water.
2. The more ghee is added, the most tastier it gets. The usage of ghee is totally based on your taste requirement.
3. No need to separately fry sooji prior to preparing this pongal.

24 October 2013

How to Soften Soya Chunks

Soya Chunks (or) the Meal Maker is an excellent source of protein supplement in your diet. The soya chunks available in the market are dry in look and appear as chunks. To make them edible for cooking, we need to cook the soya and soften them for cooking purpose. Once cooked, use them in any variety of dish to suite  your taste.

Method:

1. Heat water until it starts boiling. Add the dry soya chunks into the boiling water. Add little salt too. Close and keep aside for 15-20 minutes.


2. Open and strain the hot water from soya. Wash the soya over cold water.


3. Squeeze of the water from each soya and keep ready for cooking use.


Soya Chunks Pulav

Soya Chunks, as you may be aware, is a protein-rich meat substitute for vegetarians. They are called with different names like Soy nuggets, Soy chunks, Soya Nuggets etc. They are popularly known as Meal Maker. They are made from Soya Beans. Soya chunks are odorless and tasteless food item, but when mixed with other vegetables and spices, they absorb the flavor of the food and don't give a bland taste anymore.

Health Benefits of Soya Chunks:

1. It is extremely high in protein and contains no or very little fat.
2. It is very good for health especially for diabetics and heart patients.
3. Soya nuggets provides a good amount of vitamins, minerals, fiber and protein for growing children.
4. Soya bean is one of the best non-fish sources of essential omega-3 fatty acids, that can help in reducing the risk of coronary heart disease.
5. Soy protein has various benefits for the women, especially during the post-menopausal years.

Soya chunks can be prepared in numerous ways & has a staple place in Indian cooking. It can be used right from salad, soup, curries to pulav's & biryani's. This is a very simple & easy to cook pulav version of Soya Chunks, that results as a flavorful rice. Children will sure love this if it's is prepared in a spicy manner. So, enjoy making this nutritive pulav and relish it with entire family.

Ingredients:

Soya Chunks - 25
Basmati Rice - 2 Cups
Onion - 1 big, slit lengthwise
Green chillies - 4 or 5
Ginger (chopped) - 2 tsp
Garlic pods (peeled) - 4
Red chilly powder - 1/2 tsp
Coriander powder - 1/2 tsp
Garam masala powder - 1 tsp
Turmeric powder - 1 tsp
Salt - 1 to 2 tsp
Coriander leaves (chopped) - 2 tsp

Oil - 5 to 6 tsp
Seasoning Ingredients : Cumin seeds - 1 tsp, Fennel seeds - 1 tsp


Pre-requisite:

1. Pressure cook rice separately and keep ready.
2. Grind into paste (no need to add water) -  green chillies, garlic and ginger & coriander leaves.
3. Soften soya chunks and keep ready. Click to see how to soften soya chunks

Method:

1. In Kadai/non-stick pan, add oil and when it becomes hot, add cumin seeds & fennel seeds and fry until it becomes aromatic.


2. Add the chopped onion and fry until onion turns light brown.


3. Add the ground green paste and mix well.


4. Add chilly powder, coriander powder,  turmeric powder, garam masala and salt and mix well.


5. Add the soft soya chunks and mix well and cook for a min or two, for the essence of the masala's to coat into the soya chunks.


6. Add the cooked rice and mix well.


7. Keep covered and cook on low flame for a 3-4 minutes.


8. Open & garnish with coriander leaves and remove.


22 October 2013

Red Coconut Chutney

Red Coconut Chutney ??? Sounds bit weird right, how can coconut chutney be red instead of white, Well, It is....this is a simple coconut chutney made with coconut and red chillies. The red color comes from the red chillies. As this is a raw grind chutney, preparation time for this chutney is less than 5 minutes and can be a good choice of chutney when you need to fix a quick side dish for idlie's/dosa's. This is a frequently prepared chutney for idlies at my in-law's place and we just love the combo.

Ingredients:

Shredded Coconut - 1 Cup
Red chillies - 5 or 6 (upto your spice taste)
Tamarind piece ball - pearl size
Salt - 1 or 2 tsp
Seasoning Ingredients: Oil - 2 tsp, mustard seeds - 1 tsp, broken urud dhal - 1 tsp, small onions - 5 (chopped to small pieces), asafoetida - 1/4 tsp, curry leaves - 6


Method:

1. Raw grind together - coconut, red chillies, tamarind & salt adding required water.


2. In kadai, season as given, 


Fry till the urud dal turns light brown & onion becomes aromatic, and then pour the ground chutney onto the seasoning and switch off immediately and mix well.


Red coconut chutney is ready. Serve for idlie's/dosa's as a side dish.

20 October 2013

Broccoli - Brussels Sprouts Salad

This is another salad version of Broccoli combined with Brussel Sprouts, which is similar to broccoli, a super-nutrient food, packed with enormous goodness. Both these super-good vegetables are combined together in a salad recipe. Eating this salad at least once a week, is sure to a wise diet choice for good health.

Health Benefits of Broccoli:

1. Prevents cancer. Anti-carcinogen properties are also present in broccoli and these are effective in hindering the development of prostate, cervical and breast cancer while also improving liver health.
2. Maintains a healthier nervous system. This can be attributed to its high potassium content.
3. Regulates blood pressure. This is possible because of the presence of magnesium, calcium and potassium in broccoli.
4. Reduces cholesterol. The vegetable contains a huge amount of soluble fiber which is proven to be effective in drawing out cholesterol from the body.
5. A great addition to your diet. For those who are dieting, broccoli can be a perfect addition to their diet plans. This is rich in fiber which prevents digestive problems and constipation, curbs overeating and maintains a lower and healthier level of blood sugar.

Health Benefits of Brussels Sprouts:

1. Brussels sprouts are high in protein.
2. Brussels sprouts are loaded with vitamin A, potassium, calcium.
3. Brussels sprouts are very high in fiber, and they belong to the disease-fighting cabbage family. Indeed, they look like miniature cabbages.
4. Like broccoli and cabbage , Brussels sprouts may protect against cancer.
5. Brussels sprouts are also particularly rich in vitamin C, another anti-cancer agent.

This salad is very quick to fix and tasty to eat. A minimal cooking is done on these two vegetables, uncompromising its nutrient in the cooking process & then mixed with few other vegetables to make the yummy salad. Weight-watchers can happily include this salad in your regular routine.

Ingredients:

Broccoli Florets, cut to thin long pieces - 1 Cup
Brussels Sprouts, chopped into small pieces - 1/2 Cup
Onion- 1, Chopped lengthwise
Tomato -  1, de-seeded and chopped to medium pieces
Assorted Broken Nuts - 2 Tbsp (mix of almonds, walnut, pistachio & raisins)
Salt - 1 tsp
Pepper Powder - 1 tsp
Vegetable Masala powder or Garam  Masala Powder - 1 tsp (Optional)
Olive Oil - 2 tsp

Pre-requisite:

1. Boil broccoli florets and Brussels sprouts in very limited water up to 5 minutes max (don't over boil, crunchiness of both vegetables to be maintained). Strain all the water and keep ready.

Method:

1. In a broad bowl, add the boiled broccoli florets & Brussels sprouts,  chopped onion, de-seeded & chopped tomato, broken assorted nuts, pepper powder, vegetable masala powder or garam masala powder, salt and olive oil and toss nicely and serve chilled or immediately.


Broccoli Salad

Broccoli is considered to be one of the most nutritious vegetables that can offer numerous health benefits. It is more commonly used as salads. Broccoli mixed with combination of vegetables makes interesting variety of salads which are very healthy.

Health Benefits of Broccoli:

1. Prevents cancer. Anti-carcinogen properties are also present in broccoli and these are effective in hindering the development of prostate, cervical and breast cancer while also improving liver health.
2. Maintains a healthier nervous system. This can be attributed to its high potassium content.
3. Regulates blood pressure. This is possible because of the presence of magnesium, calcium and potassium in broccoli.
4. Reduces cholesterol. The vegetable contains a huge amount of soluble fiber which is proven to be effective in drawing out cholesterol from the body.
5. A great addition to your diet. For those who are dieting, broccoli can be a perfect addition to their diet plans. This is rich in fiber which prevents digestive problems and constipation, curbs overeating and maintains a lower and healthier level of blood sugar.

Here is a simple broccoli salad recipe with just onions and mixed nuts, which is very easy to fix and quite tasty to eat.

Ingredients:

Cooked Broccoli - 1 Cup
Onion, chopped - 1/4 Cup
Mixed Broken Nuts (Almonds, Walnut, Pistachio, Raisin) - 2 tbsp
Pepper powder - 1 or 2 tsp
Salt - 1 tsp
Olive Oil - 2 tsp

Cooking Broccoli:

1. Remove the florets from the broccoli, cut them into 2 (slit across) and drop them in boiling water and keep closed for about 5 minutes. Then strain all the water and wash the broccoli once in running water and keep aside the water-drained broccoli florets.

Method:

1. In a broad bowl, add the cooked broccoli, chopped onions, mixed nuts, pepper powder and salt and mix well.
2. Toss the olive oil on the above, mix well and then serve.


Tips:

1. The broccoli need not be completely cooked, the crunchiness should be maintained while eating the salad.
2. For those who want the broccoli to be further cooked, drop the raw broccoli florets in water and cook it for 10 minutes and remove. This will make broccoli quite soft and not too crunchy.
3. For more decorative purpose and added taste purpose, to the above salad add de-seeded tomatoes (raw),  bunch of chopped lettuces, grated raw cabbage (or semi-cooked) slices optionally.

16 October 2013

Sprouted Moong Gravy

Green gram Sprouts  (Sprouted Moong) is a power-house of nutrients.  Nowadays there is fairly an awareness among people about its health benefits. It's use in Indian cooking varies from salads, soups, pulav to sabji's. This is a gravy version of the cooked green gram sprouts, that is mixed with some spices & made into a gravy which is very well suited for chapathi/roti. Even those who do not like sprouts, will enjoy this gravy, as the masala flavors subdues the bland flavor of sprouts and gives it a palatable taste .

English Name : Sprouted Moong (or) Green Gram Sprouts / Tamil Name : Paccha Payaru

Health Benefits of Green Gram Sprouts:

1. Sprouts are one of the most complete and nutritional of all the foods that exist.
2. Sprouts have greater concentration of vitamins, minerals, proteins and enzymes.
3. Sprouts are easily digestible. Abundant enzymes make them easy to digest.

Pre-requisite:

1. Pressure cook sprouted green gram adding required water for 2 whistles. Cool and open, drain all the water and keep both the cooked sprouted green gram and sprouts water ready for cooking use.

Ingredients:

1. Sprouted green gram - 1 cups
2. Onion - 1, chopped
3. Tomato - 1, chopped
4. Red chilly powder - 1/2 tsp
5. Coriander powder - 1 tsp
6. Dry Mango powder - 1/2 tsp
7. Salt - 2 tsp
8. Green Chillies - 3 (Slit into 2)
9. Coriander leaves (chopped) - 2 tsp
10. Chopped Ginger-garlic pieces - 2 tsp
11. Seasoning Ingredients: Oil - 2 tsp, cloves - 2, cinnamon stick - 2, cumin seeds - 1 tsp


Method:

1. In Oil, season with cumin seeds, cinnanom, clove, ginger and garlic pieces and fry until the spices turn aromatic.


2. Add chopped onion and fry till it turns translucent.


3. Add chopped tomato and fry till it turns mushy.


4. Add the spice powders - red chilly powder, coriander powder, dry mango powder & salt and mix well. Add the preserved sprouts water and cook for 2-3 minutes.


5. Add the cooked sprouted green gram and slit green chillies and mix well. Add required water (around 1 to 2 glass depending on your gravy consistency). Close the lid and cook for 5 minutes.


6. Add the garam masala powder (optional) and coriander leaves and mix. Remove and serve.


01 October 2013

Raw Banana Puttu

Raw Banana (Green Banana) is one of the vegetables used in south-indian cooking commonly, especially in Tamil Nadu. The most common consumption form of this vegetable is like a poriyal/stir fry. There are numerous way raw banana can be cooked as a poriyal. In my mother-in-law place, I have seen this vegetable being prepared in a slightly different way called "Vazhaikai Puttu", In this, the banana is cooked separately and then mixed with onion and coconut and little spices to make this puttu. The banana is grated for this purpose and not chopped, unlike for a normal poriyal/stir fry.

This vazhaikai puttu is a good accompaniment for any sambar, kozhambu or rasam.

English Name : Raw Banana (Green Banana) / Tamil Name : Vazhaikai / Hindi Name : Kacha Kela / Malayalam Name : Paccha kaya / Telugu Name : Aratikaya

Ingredients:

Raw Banana (Green Banana) - 4, grated
Onion - 1, chopped
Coconut - 3/4 Cup
Seasoning Ingredients: Oil - 2 tsp, mustard seeds - 1 tsp, broken urud dhal - 1 tsp, channa dhal - 1 tsp, curry leaves - 6, green chillies (chopped) - 4
Coconut oil - 1 tsp (optional)


Pre-requisite:

Chop both the corners of raw banana and cut the raw banana into two and drop it into boiling hot water with its skin and cook covered for 5 to 7 minutes(or up to 10 minutes max). In between open and check whether the banana is cooked by piercing lightly into the banana, you should feel it's softness and the skin will lightly smudge by the piercing effect. At this stage switch off and remove the cooked banana's from the water (do not overcook). Drain all the water, cool it for a minute or two and then peel the banana skin and grate it using a grater and keep the grated banana ready.


Method:

1. In oil, season with - mustard seeds, urud dhal, channa dhal, curry leaves & green chillies and fry till the dhals turn brown.


2. Add onion and fry till it turns light brown & remove from stove.


3. Add the grated banana & coconut and mix well. Add a teaspoon of coconut oil after mixing everything and serve.


Tips:

Adding coconut oil at the end, is only to enhance the flavor, it is not a must.