24 September 2013

Vegetable Salad - II

For a healthy living, it is important that we cultivate the habit of healthy eating for which salad is a very good option. You can make numerous variety of salads mixing various ingredients from vegetables, fruits, lentils to nuts. Having a colorful salad not only feasts your eyes but your hunger too.

Here is a healthy vegetable salad version, that can be prepared in a jiffy and relished.

Ingredients:

Carrot - 1/2, chopped to small pieces
Cucumber - 1/2, chopped to small pieces
Tomato (small) - 1, chopped to small pieces
Beetroot (small) - 1, chopped to small pieces
Fresh Beans - 10, chopped to medium pieces
Cooked/Boiled Channa (Black) - 20
Cooked/Boiled Rajma - 20
Peas - 1/4 cup
Corn - 1/4 cup
Shallots - 3 or big onion - 1/2, chopped to small pieces
Garlic - 3, cut lengthwise
Ginger - 1 tsp, shredded to small pieces
Green chillies - 2, chopped to small pieces
Salt - 3/4 tsp
Pepper powder - 3/4 tsp
Coriander leaves - 1 tsp, finely chopped
Lemon Juice - squeezed from 1/2 lemon

Method:

1. In a broad bowl, add together as it is the chopped vegetables - carrot, cucumber, tomato, shallots or onion, ginger, green chillies & boiled channa and rajma.
2. In limited water, cook together beetroot, fresh beans, garlic, peas and corn, until the vegetables are 60% cooked (maintain the crunchiness in the vegetables). Once cooked, strain all the water from the vegetables & keep ready.
3. Mix the contents of 1 and 2 very well and serve chilled or immediately.


Tips:

1. If frozen peas or corns or any vegetables are used, no need to cook them again, drop the frozen vegetables in boiling hot water and let it remain for 5 minutes, then drain all the hot water and wash once in running water and keep ready for use.
2. To get the benefits of all the vegetables as it is, recommended to use them fresh instead of frozen.

20 September 2013

Oats Dosai

Oats, which is getting very popular all over the world, is well known for its immense health values. Since long, we have been hearing oats intake being regular with diabetic patients and old people. Oats is actually a meal which can satisfy the young one's too. Due to its plain tasteless nature, it is not preferred by many, and often misconceived as a patient food. This is not true, We can cook oats in various different and tasty ways & get benefited by it to enjoy good health.

Oats dosai, is an instant dosai, made primarily with oats and other flours, which can be enjoyed as much as a normal dosai, when accompanied with a tasty side-dish. Oats can be habituated into various tiffin items that we regularly eat like upma, pongal, chapathi etc.

Best Accompaniment : Onion-Tomato Chutney / Onion Chutney

Health Benefits of Oats:

1. Oats help Reduce the Risk of Type 2 Diabetes.
2.  Oats for Weight Loss. Starting the day with a nutritious, fiber rich meal such as oats can help with maintaining a healthy weight. Oats has been found as having the highest value of all breakfast meals, giving a feeling of fullness for longer.
3.  Oats contains a substance called beta-glucan which significantly reduces LDL cholesterol.
4. Oats beta-glucan improve Immune system defenses  against bacteria, viruses, fungi, and parasites.
5. Oats Help cut the use of Laxatives.

Let us look at making an instant oats dosai now.

Ingredients:

Oats - 1 Cup
Rice flour - 1/2 Cup
Semolina -  1/4 Cup
Salt - 1 tsp
Curd - 3/4 Cup
Water - 1/2 Cup
Onion (small) - 1, chopped finely
Green chillies - 2, cut to small pieces
Oil - 1 tsp


Method:

1. In a broad bowl, add oats, rice flour, semolina, salt, curd and water and make into a thick batter & set aside for 5 minutes.


2. In a kadai, add oil, and fry onion and green chillies, until onion turns translucent & remove.


3. Mix the fried ingredients in step 2 into the batter made from step 1 & mix well.


4. Heat the dosai tava, when it becomes hot, smear little oil across the tava and pour a ladle of this oats batter in the middle and spread the batter into a thick small circle (to the size of your palm). Drizzle oil around the corners and the middle of the batter. Wait till the bottom corners turn brown and toss the dosa on the other side and allow it to get cooked (small brown spots to appear evenly across the inner portion) and then remove from the tava and serve with any chutney.


Tips:

1. The oats dosai doesn't come thin , crisp and big like normal dosa, it should be of oothappam thickness, can be small sized (like palm size), as it breaks easily while tossing.
2. Eat this dosai while it is hot, once it gets cold, you may not enjoy the taste so much.
3. Adding the fried onions and green chillies are optional, this is to give some extra flavour & little spice to the dosai, if you want to avoid this , you can make dosai without onions and green chillies.
4. You can also add 1 teaspoon of cumin seeds into the batter before making the dosai, if you want.

18 September 2013

Banana Milkshake

Banana is a very staple fruit in India. It is consumed just like that, very regularly by lots of people, owing to its taste, fillingness and health benefits. It is a nutritious and wholesome fruit.

Health Benefits of Banana:

1.Banana's are caloric dense fruit, eating just one banana keeps you full for a long time.
2. They are good source of potassium and magnesium. High potassium promotes bone health.
3. Banana is rich in soluble fiber pectin, thereby it assists digestion and eases out constipation.
4. Banana's are known for improving your mood owing to compound, which is a mood stimulant present in it.


Banana Milk Shake is a healthy Banana drink that can be enjoyed by everyone, from children to elders. This can be prepared in a jiffy. If there are plenty of banana at home, making of this milkshake is a good way to consume lots of banana at one go.

Ingredients:

Banana - 2
Milk - 1 Tumbler/glass
Water - 3/4 Tumbler/glass
Sugar - 3 tsp


Method:

1. Take all the ingredients into a mixer/mixie and grind until it becomes a smoothie/milkshake.


Tips:

1. While grinding, you can add 2-3 ice cubes & blend.
2. For thicker milkshake, increase the quantity of milk and decrease the quantity of water.

16 September 2013

Vegetable Salad - I

Fresh Salads are a very nutrition-packed instant food you can relish upon. A very well known benefit of salads is that, it helps immensely in weight-loss, not only that, salads (mostly raw/semi cooked) take time to digest and are generally low on calories, hence keep your stomach full for a quite a long time and also gives all the nutrition from its ingredients uncompromisingly. Salads also increases the intake of vegetables and fruits in your diet.

For a healthy living, it is important that we cultivate the habit of healthy eating for which salad is a very good option. You can make numerous variety of salads mixing various ingredients from vegetables, fruits, lentils to nuts. Having a colorful salad not only feasts your eyes but your appetite too.

Here is a healthy vegetable salad version, that can be prepared in a jiffy and relished.

Ingredients:

Carrot - 1/2, chopped to small pieces
Cucumber - 1/2, chopped to small pieces
Tomato (Big)- 1, chopped to fine pieces
Peas - 1/4 cup
Corn - 1/4 cup
Fresh Beans - 10, chopped to medium pieces
Shallots (small onion) -  4  or Big Onion - 1/2
Garlic - 3, chopped to fine pieces
Ginger - 1 tsp, chopped to fine pieces
Lemon Juice - Squeezed from 1/2 Lemon
Coriander Leaves - 1 tsp, finely chopped
Salt - 1/2 tsp
Pepper Powder - 1 tsp

Method:

1. Boil fresh beans, peas, corn and garlic in water, until they are 70% cooked (the vegetables can be little crunchy to eat) and remove. Strain all the excess water and keep ready.
2. Take into a broad bowl the remaining ingredients like chopped carrot, cucumber, tomato, ginger pieces, lime juice, pepper powder, salt and coriander leaves.
3. Mix the contents from 1 and 2 very well and serve chilled or immediately.


Tips:

1. Garlic is added for flavor sake, you can avoid if you are not a garlic lover.
2. While cooking vegetables, don't cook them full, the crunchiness in the vegetables makes it more interesting to eat.
3. Pepper powder can be freshly made and mixed, to enhance the spice factor, instead of using store-bought powder.

4. For best nutritive effect, eat the salads fresh.

14 September 2013

Vadacurry

Vadacurry is a famous South Indian gravy/curry served along with Idlies and dosa's. In most of the South Indian restaurants, you can see an item "set dosa-vadacurry" as a standard menu in their menu card. As the name suggests, vadacurry is a curry made with vadai's. At an outset, this dish looks very elaborate to prepare as it requires vadai's to be made first and then the gravy to be prepared on it, that is the reason it is often not cooked at home. But, if we don't mind the little extra time taken for its preparation, this is sure a very palatable side-dish for your idlies and dosas, and a good variation from the usual sambar's & chutney's.

Conventionally, for preparing the vadacurry, you prepare normal masala vadai  & fry it in oil and once the fried vadai's are ready, we break them to pieces and the prepare the gravy to soak the vadai's. Because of the frying part, this recipe calls for more oil usage. Also with extra oil in the recipe, you start feeling too full very soon.

If you want to health-consciously prepare this vadacurry in less oil, you have an alternative.  Instead of deep frying the vadai's in oil, steam them in cooker and use the steamed vadai's for the gravy. This way, you don't need too much oil. This method of vadacurry preparation was taught to me by my aunt, Mrs. Geetha and the outcome is not only tasty but healthy too !!! I have cooked vadacurry in this method to happily indulge in a tasty curry with less guilt and more appetite !!!

Ingredients:

Big Onion - 2, chopped to medium size
Medium Tomato - 2, Chopped finely
Channa Dhal - 1 1/2 cups
Green chillies - 6, slit into 4 pieces each
Ginger-garlic paste - 2 tsp
Red chilly powder - 1 tsp
Coriander powder - 2 tsp
Salt - 2 tsp
Oil - 6 to 8 tsp
Coriander leaves - 3 tsp, chopped finely
Coconut - 1/2 cup
Seasoning Ingredients: Fennel Seeds - 1 tsp, Cumin seeds - 1/2 tsp

Pre-requisite:

1. Soak channa dhal in warm water for 2 to 3 hours. Drain all the water and keep ready.
2. Grind coconut adding little water to a medium paste.

How to prepare vadai :

1. To grind coarsely without adding water or with very minimal water :- water strained channa dhal - 1 1/2 cups, fennel seeds - 1 tsp, salt - 1/4 tsp


2. Take the coarsely ground mixture and pat them into mini vadai's and place them in the mini idly plate or any other plate and steam in pressure cooker for  7 minutes, as we do for idlies.


3. Once cooked, remove and cool and break these vadai's by hand and keep the broken/mashed vadai's ready for cooking.


Method:

1. In a non-stick pan/kadai, add oil and when it becomes hot, add the seasoning ingredients and fry until fennel seeds turns aromatic and the cumin seeds turns brown.


2. Add the chopped onion and fry until onion turns light brown.


3. Add ginger-garlic paste and slit green chillies and mix well and fry until the rawness in the green chillies goes and ginger-garlic emanates nice aroma.


4. Add the chopped tomato and mix very well and cook until it turns mushy.


5. Add the ground coconut paste and mix well. Now add a cup of water and let all contents boil well.


6. Add the mashed vadai's and mix well. Cook covered for 5 minute on low flame, for the flavors of the masala's to get mixed into the vadai's.


7. Open and add chopped coriander leaves and mix well and then remove.


Tips:

1. While seasoning at beginning, you can also add other spices like bay leaves - 2 leaves, cloves - 3, cinnamon stick - 2, cardamom - 2 for added spice and flavor.
2. Optionally, you can also add chopped garlic & ginger and saute well immediately after seasoning, for additional flavor.
3. You can avoid coconut paste too if you wish. This is for extra taste.
4. Alternatively, you can go with the conventional method of frying the vadai's instead of steaming it and then proceed to make the vadacurry as above.

12 September 2013

Vangibath

Vangibath  (Fried brinjal rice) is a South Indian dish originated in Karnataka. Typically found in Karnataka, spicier variety of this dish is often found in neighbouring states Andhra Pradesh and Tamil Nadu. It is equally famous in Maharashtra.

This is a dry dish, where the brinjal's are fried separately with onions and spice powder and mixed with cooked rice. The spice powder called vangibath powder is specially prepared for this rice. It is the spice flavor in this powder, that gives the vangibath its unique flavor and taste. Any roasted curry, raita or papads, goes well as a side-dish with vangibath. This can be ideally a lunch box dish and children will love it for its different taste.

Brinjal (Eggplant) has numerous health benefits. So adding vangibath to your food routine, not only gives you a good variation for your appetite, but also other add-on health benefits. So enjoy making and tasting this yummy and healthy vangibath.

Health Benefits of Brinjal:

1. The eggplants are a very rich source of fibre and low soluble carbohydrates. Thus a good choice for diabetic persons.
2.  The content of nasunin that is present in eggplant helps remove excess iron from the body. This brings down the risk of getting heart attacks as it damages the existence of the free radicals in one’s system.
3. Eggplant is considered to be high in water content yet low in calorie count. This feature makes it very ideal as a healthy diet for people who want to reduce weight.
4. The skin is well hydrated owing to the high water content an eggplant has. It is also good for the hair.
5. Eggplant reduces the chance of cardio vascular diseases and strokes.


Ingredients:

Brinjal - 6 to 8, chopped to medium size
Onion  - 2, chopped to medium size
Tamarind extracted water - 1/2 cup
Vangibath masala powder -  5 tsp (3 tsp for cooking, 2 tsp for garnishing at the end)
Turmeric powder - 1 tsp
Coriander leaves - 3 tsp, chopped fine
Seasoning Ingredients: Oil - 3 tsp, mustard seeds - 1 tsp, broken urud dhal - 1 tsp, channa dhal - 1 tsp, broken cashews - 10, curry leaves - 10, hing - 1/2 tsp


Cooked Rice - 3 Cups


Method:

1. In a non-stick pan/kadai, add oil, when it gets hot , season with mustard seeds, urud dhal, channa dhal, broken cashews, curry leaves & hing.


 2. Add onion and fry till it turns brown and aromatic.


3. Add chopped brinjal and turmeric powder, and fry till brinjal is well cooked. Cook covered and open and stir regularly to avoid brinjal sticking to the bottom of the pan. If needed, added 2-3 tsp of extra oil.


4. Once the brinjal's are well cooked (which takes about  10-15 minutes approx), add 2 to 3 tsp of vangibath powder and mix well. Cook for a minute or two.


5. Add the tamarind extracted water and mix well & let the entire mixture cook for another minute or two & then remove from the stove.


6. Now add the cooked rice + a teaspoon of oil + 2 teaspoon of vangibath powder & mix well, until the rice is well coated with the brinjal mixture.


7. Finally, garnish with coriander leaves and serve.

 
Tips:
 
1. While cutting the brinjal, add the chopped brinjal in water to avoid discoloration, and just before cooking drain all the water and use the brinjals for cooking.
2. Adding Vangibath powder & oil on the plain rice before mixing adds up the flavor to the rice.


Vangibath Powder

Vangibath Powder is a special spice powder that is prepared and added while making vangibath, a Karnataka special rice dish made with brinjals.

The addition of spices likes clove, cinnamon etc to the existing dhals gives this powder a strong flavor, which when mixed with rice, gives the dish all together a unique taste.

If you follow the same measurement  as below for this vangibath powder preparation, it comes to 2 to 3 times use. This powder can also be prepared in bulk quantity by increasing the measurements proportionately and refrigerated for longer use. Whenever needed, take the refrigerated powder and transfer the required quantity into another bowl and immediately seal it and put it back in the fridge. This retains the aroma and freshness of the powder and also guarantees longer shelf life.

Here it goes, the Vangibath powder recipe.

Ingredients:

1. Coriander seeds - 4 tbsp
2. Channa Dhal - 3 tbsp
3. Urud dhal - 1 1/2 tbsp
4. Coconut - 1/2 cup
5. Red chillies - 25
6. Fenugreek seeds - 1 tsp
7. Cumin seeds - 1 tsp
8. Cinnamon stick - 3, cloves - 3, cardamom - 2, star anise - 1
9. Hing (powder) - 1 tsp


Method:

1. Dry roast together - channa dhal & urud dhal till light brown & remove.


2. Dry roast together - coriander seeds + cinnamon stick + cloves + star anise + fenugreek seeds + cumin seeds till aromatic and turns light brown & remove.


3. Dry fry coconut till light brown and aromatic (& devoid of any moisture) & remove.


4. In little oil, fry the red chillies untiil they turn light brown.


5. Mix the contents from 1 to 4 in a plate or vessel and then add hing. In the heat, the hing gets cooked.


6. Cool and powder and refrigerate.


11 September 2013

Sweet Corn Rice

Corn (popularly known as maize) is one of the cereals, which we can enjoy in variety of ways right from salads, snacks, rice to soups. It is a simplest and purest pleasures to indulge. Corn offers numerous health benefits. So making it a regular portion in our diet definitely ensures good health.

Sweet Corn Rice is a simple to cook rice dish with corn and few basic masala's. The cooked rice is mixed with corn and spices to give a unique flavour. The spice powder's tanginess and the corn's sweetness when mixed together offers a unique taste and it is so enjoyable with just a simple raita or chips. You can also prepare any other gravy dish of your choice to accompany this sweet colorful dish.


This is ideally a kadai dish. Also this makes up for a ideal lunch box dish. 

Health Benefits of Corn:

1. Corn is filled with fiber that are a huge boon for digestion. It prevents constipation, hemorrhoids and even lowers the risk of colon cancer considerably.
2. Corn contains a large proportion of magnesium, iron, copper and most importantly phosphorus, which is needed for healthy bones.
3. Corn is rich in antioxidants, which help in keeping the skin younger for longer. It can also be applied as Corn Oil which is a rich source of Linoleic acid. Corn starch is also useful to soothe skin irritations and rashes.
4. Prevents anemia- Anemia is a condition where the red blood cell count is reduced considerably due to the lack of iron. Thus, sweet corn benefits health as it is rich in vitamin B and folic acid that prevents anemia.
5.  The vitamin C, carotenoids and bioflavinoids contained in sweet corn keep your heart healthy by controlling cholesterol levels and increasing the flow of blood in the body.
6. Pregnant women should make it a point to include some corn in their diet. Consumption of corn provides a rich source of folic acid.

I have used frozen corn in this recipe (softened the frozen corns by soaking them in boiling water for 5 minutes) or you can use fresh corn kernels which can be boiled/cooked.

Let's see how this simple sweet dish is made.

Ingredients:

Sweet corn - 1 cup
Cooked Rice - 1  1/2 Cups
Onion - 1, chopped lengthwise
Ginger garlic paste- 1 tsp
Pepper powder - 1 tsp
Cumin powder - 1 tsp
Garam masala powder - 1 tsp

Dry Mango Powder - 1/2 tsp
G. chillies - 4, slit lengthwise
Coriander leaves - 2 tsp, chopped finely
Cumin seeds - 1 tsp
Salt - 2 tsp

Turmeric Powder - 1/2 tsp (Optional)


Method:

1. In a non-stick pan/kadai, add oil and add cumin seeds and fry till it turns brown. Add ginger-garlic paste & fry well.


2. Add the chopped onion and fry until it turns light brown & then add slit green chillies and fry well for a minute or two.


3. Add the pepper powder, cumin powder, turmeric powder (optional) , salt & coriander leaves & mix well.


4. Add the sweet corn and mix well.


5. Add the cooked rice and mix well. Close the pan and lower the flame to minimum and cook for a minute or two & then open the pan.


6. Just before removing, add the garam masala powder and mix well and cook for a minute and then remove.


Tips:

Adding dry mango powder is for a slightly tangy taste to the rice, you can ignore this if you want.

09 September 2013

Poha Payasam

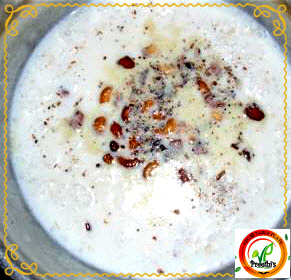
I have a reason to celebrate now. My blog has touched its first milestone - Yes, THIS IS MY 100TH RECIPE POST. Is it not a good enough reason to celebrate ??? And sweets always add up the mood of celebration. So here I am, presenting my first sweet dish in this blog - Poha Payasam or Aval Payasam. This is a very simple to make payasam, yet it tastes delicious.

Aval Payasam is generally made as an offering to lord Sri Krishna on occasion of Krishna Jayanthi / Janmasthami.

As I am posting my 100th recipe, I take this opportunity, to thank every reader/visitor to this blog, whose visits & comments have been an immense source of encouragement for me to keep going steadily with my recipes and make this blog what is it now. This blog is also helping me to evolve myself as even a better cook, exploring areas which I might otherwise have left unvisited. My blog will continue focusing on its motto to provide simple & healthy vegetarian cooking accessible and interesting to its readers and to encourage them to try out my recipes at your home. I wish to take this blog to the next level with the same zeal and zest, and do await more recipe categories and healthy recipes, which will come up soon in the future. Keep watching this space regularly & eat healthy and live healthy.


For now, try this aval payasam and sweetly enjoy this sweet dish.

Ingredients:

Poha or Aval (White, thick variety) - 1 Cup
Milk - 1 litre
Sugar - 1/2 to 1 Cup (depending on your sweetness choice)
Cardamom powder - 3/4 tsp
Broken Cashews - 10
Ghee - 4 tsp
Water - 1 Glass


Pre-requisite:

In 2 teaspoon of ghee, fry the broken cashews until light brown and keep ready.


Method:


1. In a non-stick pan/kadai, add 2 teaspoon of ghee and when it becomes hot, add the poha and fry it turns aromatic and light brown.


2. Add one tumbler of water and allow the poha to cook in it for 2-3 minutes.


3. Now add the milk and mix well. Sim the flame and allow the milk to boil. Keep stirring in between. Cook until the milk thickens and starts reducing in quantity. This might take a good 30 to 45 minutes of your time.


4. Now add the required sugar and stir well for it to dissolve and allow to cook for another 5-7 minutes.


5. Towards the end, add the cardamom powder and the fried cashews and mix well and remove after a minute or two.


A tasty Poha Payasam is ready to relish !!!